Tis the Season for Goal Setting! Okay, so I have to be honest today! I'm a TOTAL slacker this year when it comes to setting goals. I'm six months pregnant with my third and have hit survival mode with life in general, so although I've written my goals for this year (generally), I have yet to even hit the print button on my computer and make them official yet! And it's almost February!!! Well, now that my confession is out of the way...fellow slackers UNITE! If you are like me and haven't taken a moment or two to set your new year's resolutions this year, then this post is for you! If you have, and have already fallen off the bandwagon, this post is for you too! If you've set your goals and are already working like a mad-man/woman on them then good for you, and maybe these ideas will help you keep those goals past January! :)
Here are 5 Tips to Keep Your New Year's Resolutions Going Past January!
1. Put it on Paper So here's another confession since I seem to be in the mode for that today. I used to never write down my goals. To be honest, I figured if I didn't write them down or tell anyone about them, then if I failed, no big deal; only I would know and no one would be the wiser for it! Now you're probably wondering how those goals went for me...yep, you guess it! I failed miserably at most of them! It's a true fact that most goals that are not written down and shared, are also not accomplished and achieved! You sew what you reap...and reap what you sew when it comes to goals. A difficult to accept, yet true fact of life! And don't just write them down and tuck them away somewhere! You need to display them so that you will see and read them frequently. My solution was to put them up on the wall of my bathroom. After all, as a mother there are few places I actually sit and think these days, and sadly that's the most peaceful of them! :) (Even if little fingers are often found creeping under the door). You mothers know what I mean! It's one place you will visit frequently and always need good reading material, so why not have it be your goals?! :) 2. Keep it Minimal One of the biggest mistakes we make in setting goals is that we have too many. As I've looked at many goal sheets over the years, I've discovered they often have at least ten or sometimes more places for goals! In my opinion, that's way too many to keep track of! And you know what that means...they just don't happen! Choose four or five categories and narrow your goals down to those. In my house we put our goals into four categories:
Intellectual
Physical
Spiritual
Social
These are based off of the scripture found in Luke 2:52
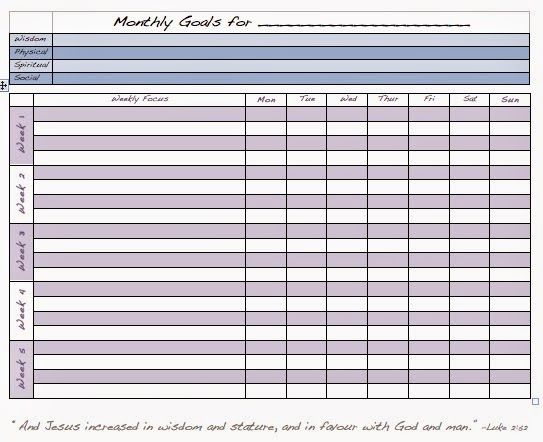
"And Jesus increased in wisdom (intellectual), and stature (physical), and in favor with God (spiritual) and man (social)."
I figure if the most perfect person that ever lived could categorize his improvements in four areas of life then certainly I don't need to go searching for more! It's enough just to try to do that!
3. Make Them Measurable and Specific Far too often we set our goals so generally that even we don't know if we've really achieved them! I used to always set goals like: eat more healthy, read more books, exercise more, lose weight, be more patient with my kids, etc. This not only sabotages your goals, but can lead to discouragement, thinking you haven't succeeded when perhaps you've made more progress than you even realize!
Instead set goals like: eat a full serving of vegetables at every lunch and dinner, only have one or two desserts a week (one portion size), read five books this year, exercise five days a week, lose ten pounds, play with my kids individually for 15-30 minutes a day, etc. These goals can be measured and are more likely to be achieved. 4. Break it Down My husband helped me with this because he is quite the organized goal setter! One year we worked together to develop a goal sheet to help us track our progress throughout the year on our new year's resolutions. After we've written our four main focus goals for the year, then each month we sit down and write a monthly goal that will help us grow closer to achieving our goal for the year in that category. Then we break it down even further into what we are going to do each week to reach that monthly goal. Don't fill in all the weeks at once!!! Do one week and then at the end of that week, assess how well you did and what you need to do to improve the next week. Some goals will carry over for several weeks as well. Here is our goal sheet if you'd like to print some for yourself! Just click on the picture and it should take you to the free download!
If you have a weight loss goal, my husband also developed this sheet which you can click on and print to help you along your way. The lines on the left are to record weight goals in five to ten pound increments (each square up is another pound). The numbers at the bottom represent days of the month. You put a dot at your weight each day and then connect the dots to make a line of progress throughout the month. The lines and boxes at the bottom are to write and record progress on small goals such as: exercise, drink 8 glasses of water, no desserts, no eating out, full serving of fruit and vegetables, etc.
5. Don't Give Up! So you messed up one day, or one week, or one month...that's okay! Too often we see small failures as reasons to throw in the towel! I do this all the time, saying things like, "Well, I already ate brownies and ice cream on Monday so I guess my whole week is shot, might as well have dessert every day!" This is SO not true! Just because I messed up today, or was too busy, or forgot, does not mean it's over! Just as is quoted in the beloved Gone With the Wind, "Tomorrow is another day!"
New years are not the only new beginnings! God has given us the gift of sleep...(praise him for that!)...and thus renewal each morning of a NEW day! Don't let yesterdays failures determine tomorrow's destinies! With the help of those we love, and especially the help of the Lord, we CAN do anything that is worth doing!!! May the force be with you! :)
Who
doesn't love the magic of the Christmas season? Twinkling lights,
delicious treats, beautiful decorations, carefully wrapped packages,
peaceful music, time with family and friends, and the wonder-filled eyes
of children. However, it saddens me that so many dread the season
these days because of the hectic craziness that shopping, parties, and
unfulfilled expectations have brought upon it. So many have forgotten,
as it's said, "The Reason for the Season!" It's not about presents,
Santa, or black Friday deals at the local shopping center. Christmas
began in a humble stable and should be remembered and celebrated with
the same quiet, humble, and peaceful love that it began.
I,
like most of you, am guilty of getting caught up in the busyness of the
holiday season, and forgetting its true purpose and meaning. That is
why I set a goal a few years ago to make something different of the
season, beginning with my decor, and continuing on to the way I count
down each moment leading up to the big day. This has not only impacted
my own perspective, but my hope is that it will shape the way my
children and their children celebrate the season that is Christmas! As
much as we love Santa, he's not the man in red I want them to focus on! :)
So,
with no further adieu, I share with you some of my favorite ways to
count down to CHRIST-mas! After all, the word "mas" means more in
Spanish, so shouldn't we have a little more Christ in our homes this time
of year?
I
hope that you find these ideas helpful as you strive to bring the
spirit of Christ back into the Christmas season in your homes and your
thoughts.
A Video A Day
I put together this video compilation of some of my favorite short Christmas videos a few years ago for my family and friends. I have now uploaded it to Youtube so that hopefully others can benefit! Please share it with anyone you know!!! Watch one a day with your family starting December 13th all the way to Christmas!
Day 1: Dec. 13th The Christmas Spirit 0:00 Day 2: Dec. 14th The Coat 4:01 Day 3: Dec. 15th An Angel Foretells Christ's Birth to Mary 6:16 Day 4: Dec. 16th Mary & Elisabeth Rejoice Together 10:26 Day 5: Dec. 17th Look To The Light 15:35 Day 6: Dec. 18th The Christ Child Is Presented At The Temple 20:12 Day 7: Dec. 19th Mary & Joseph Travel To Bethlehem 22:07 Day 8: Dec. 20th Shepherds Learn Of Christ's Birth 24:18 Day 9: Dec. 21st The Wise Men Seek Jesus 27:12 Day 10: Dec. 22nd Wise Men Still Seek Him 32:55 Day 11: Dec. 23rd The Old Shoemaker 36:33 Day 12: Dec. 24th A Gift To The World 40:05 Day 13: Dec. 25th Good Tidings Of Great Joy 49:21
He Is The Gift Website Check out this website
for awesome videos, stories, and information about the Savior for you
and your family to learn, watch, and study together. It's AMAZING and
answers so many questions you or your children may have about Jesus
Christ and Christmas!
Countdown to Christ Calendar
I
can take no credit at all for this idea...I found it on Pinterest of
course! However, I couldn't find exact dimensions I needed so I had to work
through trial and error to make mine. Here is the link for the
beautiful calendar I found on Pinterest (I wish they could have just
sent me one because I honestly like theirs better than mine!), and here
are the dimensions and details of how I made mine, in case that's
helpful for any of you out there!
*Board 20" X 25" MDF Wood painted a brick red with a glossy spray on laquer coat on top. *The word Christ is on a separate board of wood 3" X 15" hung 3.5 inches from the top of the large board painted a sage green. *The white swirly stuff behind the Christ sign is some lacy-type scrapbook paper I had lying around that I mod podged on before nailing on the Christ sign, to add some dimension since mine was lacking! *Nails are started 3/4in. down from the Christ sign and 3in. from the sides. They are spaced 3.5 inches apart from the middle of each nail to the next one and end 3 3/4 in. from the bottom of the board. *Each square is 3in square and cut from a thin MDF then drilled holes in the tops. I also painted them white before I put on pictures and paper so if there was any border it would be a pretty one. *The fronts are just scrapbook paper cut down to 3 in squares mod podged on with a vinyl number in the corner. *The pictures on the backs I bought from Deseret Book. This is the most expensive part of the project as some were about 50 cents to a dollar each. I did 2-3 layers of mod podge to get these to stay after cutting them down to 3 in. squares. *Just make sure to give plenty of dry time to all layers! You don't want to go to all of that work to have it stick together and ruin your beautiful pictures!
The baby socks
have a story or scripture for each day (along with a small treat of
course! :)) and are just numbered with vinyl numbers. I looked for cheap socks for FOREVER and finally found them here. They are out of stock now, but who knows if they will come back. Some of the socks also have a small nativity character in
them for special days when we do a character study of a different person
in the nativity. After we study each character, we add them to a small
nativity that will be completed by Christmas. This is an idea I got
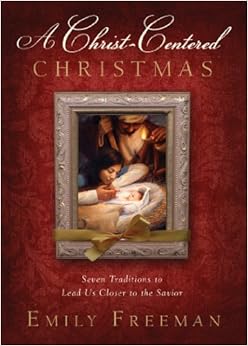
from an AMAZING book called A Christ Centered Christmas. I highly
recommend it! It's a quick read with awesome stories and activities to
do with your family to help them to draw closer to Christ.
Names of Christ Star Ornaments
This
was also an idea inspired by A Christ Centered Christmas, but the ones
you can purchase were silver and I wanted mine to stand out on my tree a
bit more. Mine are very simple, but I love how they make me think of
the Savior just a little bit more whenever I look at my tree! Remember,
He was born in a very simple, humble place! My humble stars remind me
just a little bit more of that place, and that perfect child!
I
bought the wooden stars (20 of them) for about 30 cents each, had my
husband drill holes in them and then painted them yellow with a silver
sparkle glaze (I made the mistake of doing the glaze after the letters
though and messed up a bunch of them because it smeared the paint!
Sadness!!! So, IF you glaze, do it before you write!).
To
put the words on them I just printed the names of Christ on a sheet of
paper in a font I liked and traced it onto the wood (the wood was soft
enough that tracing indented the words on the wood). After the wood was
indented with the name, I just used a permanent black marker to trace
it. Thread them with ribbons and you're done!
Kid-friendly Nativities
Some
of my favorite memories of Christmas time are of an old Nativity that
my mom gave to me to play with. I would spend hours playing with the
figures and recreating the Christmas story. Far too often a Nativity is
a touch-me-not decoration in our homes. And yes, I have one of those
too. However, I think it's so important to teach our children that the
Savior is not this distant being that we cannot get near. He is our loving brother and friend! He is accessible and as close
to us as we allow and want Him to be. What better way to teach that to
them than giving them access at a young age to those figures that tell
the story of His birth. A small thing that can really create a fond
memory and feeling.
Yet
again, I got this idea from Pinterest at this site, with a little variation according to what I could find at the craft store and then just used scraps of material
to make the clothes for the little wooden nativity. I am NOT very
creative and crafty on my own to be honest. I mean, the glue gun and I
have a love/hate relationship, leaning more towards the latter! My
sister-in-law did the sheep for me which were pretty awesome I thought!
I would have just glued on a bunch of cotton balls and called it good!
I can't tell you how to recreate the wise men hats (sorry!)...they just
kind of happened as I attempted to take needle and thread to a small
scrap of fabric (this was huge for me since I don't even own a sewing machine!). I could never do it again, but I'm glad they turned
out okay! My husband used his engineering skills and made the stable
and manger out of popsicle sticks and a glue gun after my daughter
insisted Jesus have a stable. He has a similar relationship (and scar) with the
glue gun after that experience but it turned out pretty awesome I think! Oh the sacrifices we make for our children! :)
Fisher Price also has the cutest Nativity that we just bought last year on sale and my
kids love it just as much! I probably would have never made the first
one to be honest, had I been able to find it at a reasonable price when I
was looking, but now you can even find them in Wal-Mart and Target for
around $30!!! So worth it!
Challenges are blessings...that's what I learned this last week.
Actually if we are going to be perfectly honest, it's not the first time I've learned that lesson...except that apparently I am a VERY slow learner and have to learn it over...and over...and over again! I'd like to say I'm done learning this lesson of life and ready to move on to the next one (an easier one ideally) but, truth be told, I'm pretty sure I'm in this one for the long haul. That's right, LIFE!
I can be, what I like to call, an internal complainer. Okay, so maybe it's not ALL internal, but I'd like to say I complain far more in my head than I do out loud. Sure this is great strategy when you are trying to appear positive all the time, and to avoid being extremely annoying to those around you, but internally, it has the same effect as external complaining. It destroys your overall perspective, attitude, and happiness.
However, I have found a tool that sweeps the nasty complaining bug right out of your system. It's magical really, in an oh-so-simple way. Are you ready for this "magic pill?" It's called gratitude. Okay, I know it's cliche and sounds way too simple to be effective, but it's SO TRUE! Don't believe me? Put it to the test!
This last week my car broke down while I was on an overnight trip with some friends. It was supposed to be this awesome getaway to rejuvenate my soul and my spirit, and it started out that way. However, the first night, on the way back to the hotel, we were stranded in a parking garage at the mercy of my insurance company and anyone else who may stop to give us assistance. This is the third time this car has gone in to the shop in the last few months...for the same problem which they apparently had fixed. There, of course were few rental companies in the city I was in that actually had cars available, and the only one left charged $170 for a one day rental on an economy car if you can believe that! I felt ripped off and frustrated...UNTIL I heard another story from the gracious women who came to our aid. Heaven bless them for their service in more ways than they will ever know! In the course of conversation the mother and daughter unfolded to us a tale that made me grateful for my challenge of the day. The daughter had just give birth a few months earlier to a beautiful baby girl...a miracle baby who came two months early. Previous to her birth, her mother had almost died due to complications and had spent seven weeks in the hospital, while friends and family cared for her five other children at home. My eyes couldn't help but well up in tears when she told us of how she and her husband had had to prepare their five other children for the possibility that Mommy may never come home again. How can you cry over a car after that???? When I knelt down to pray to my Heavenly Father that night all I could muster were words of gratitude for all of my blessings. There is not room enough for complaints in a heart full of gratitude for there is little to complain about when you tally up your blessings next to your adversity. The car was a small trial in comparison, but the truth is that no matter how bad things are, it can ALWAYS be worse. I KNOW that, but it's not always easy to REMEMBER that.
GRATITUDE is the gift of REMEMBRANCE!
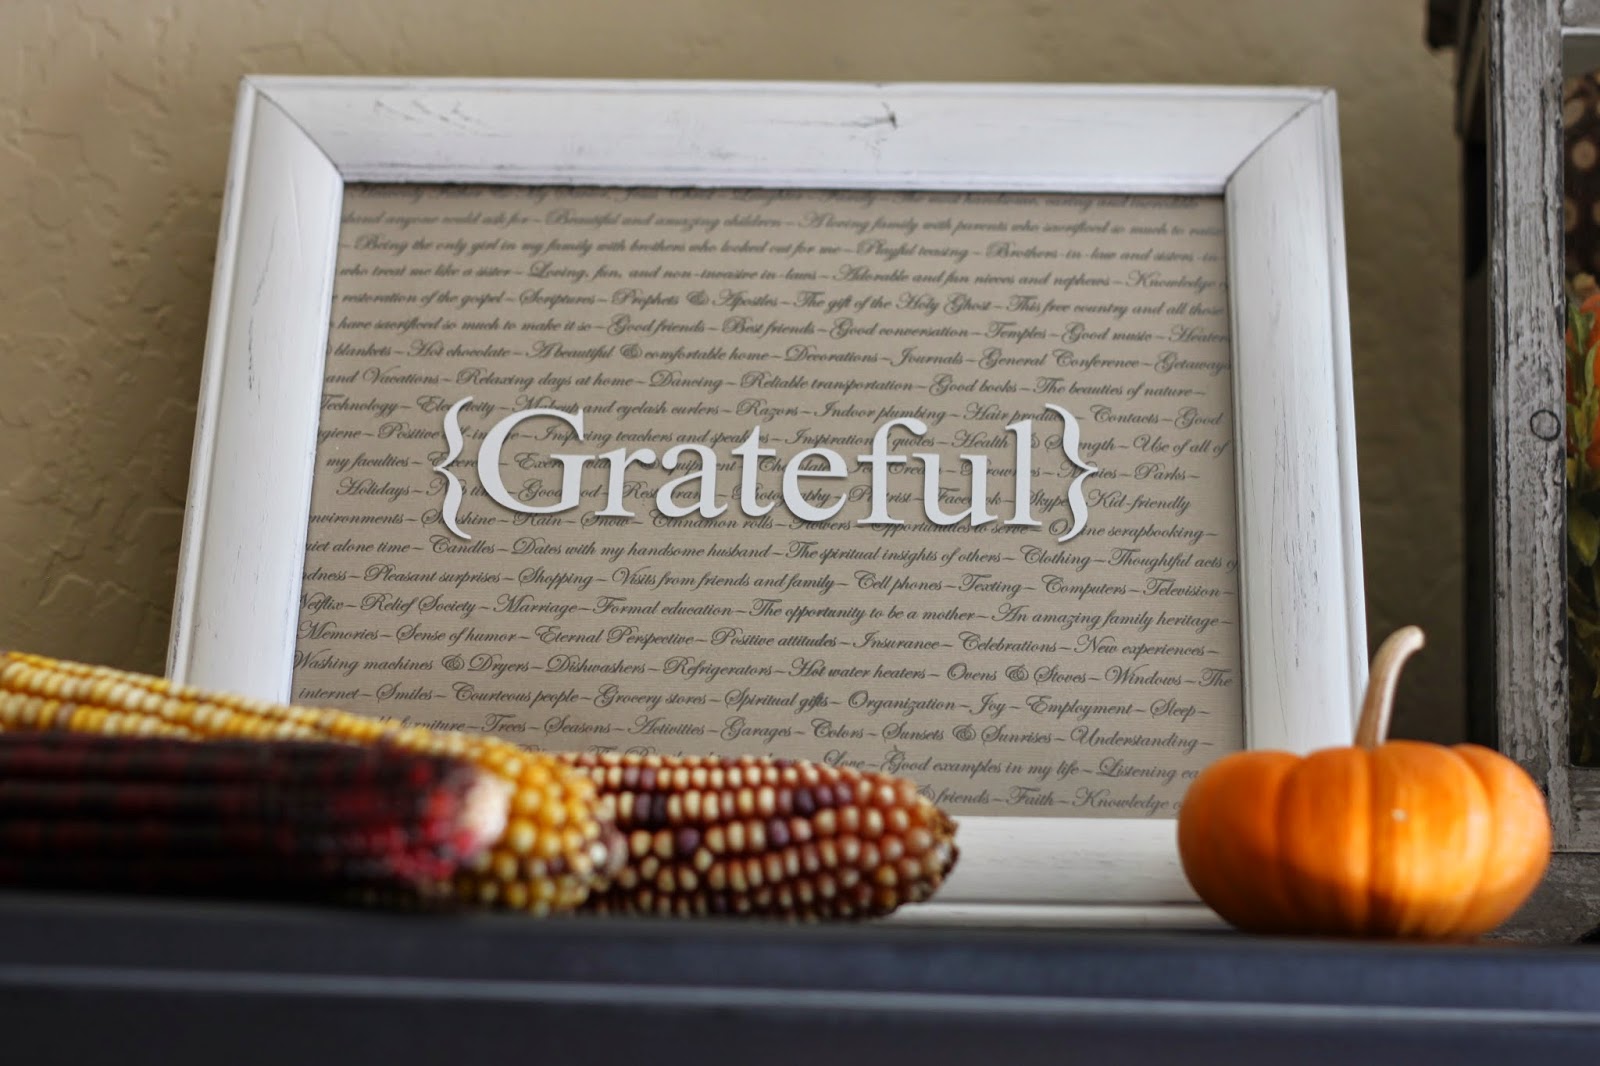
Read this article Give Me Gratitude or Give Me Debt and you'll see what I mean! One time through it and you'll feel better already! I recently also saw a movie that did wonders for my perspective and gratitude for everyday simple gifts that I've been so blessed to have in life. It's called The Good Lie. I think everyone should see this movie and any others like it, over and over again! We need reminders every day for how good we really do have it in life! One of my favorite decorations in my home that I made last year for the Thanksgiving season is a frame that says grateful on the glass. Inside the frame is a typed list of the things I'm thankful for. I chose an old-style font on browned paper for an antiqued look, but what I didn't know was that the font was extra tiny even in larger print! It took me a long time to type the list, but the reflection it caused me on my blessings was priceless!
The more we focus our attention on what we do have, the less time and energy we have to focus on what we don't!
So, this Thanksgiving season I encourage you to take time each day (or even better, in each moment of complaint!) to reflect on the good, to thank God for the blessings, and to find purpose in the challenges of life for there is a reason for EVERYTHING...we just have to look for it! Then when you realize all you have, you can't help but want to share it! The week after I saw The Good Lie, I watched this talk...time to put that gratitude into action!
This is one of my favorite videos. If you haven't seen it. It will be a few minutes more than well spent for your happiness in life!
Sure we all have questions about life, but where do we find the answers? If you are looking for answers about life, then I can promise you with a 100% guarantee of where to find them!
There are only a couple of requirements:
Sincerity
Prayer, Pondering, and Spiritual Preparation
Watching General Conference the first Saturday and Sunday of October and April!
If you are truly sincere about whatever questions you may have about life then I promise you will not only find them, but find more than you were even hoping for!
If you want to learn more about some of these amazing modern-day apostles and prophets who will speak at General Conference, as well as teach about them to your children, here is a great website to get to know them better with stories, videos, and games! It's awesome! We do one a day as a family for the two or three weeks leading up to conference and it is amazing what even my young children are learning!
A great Family Home Evening Lesson idea that I love to use with younger kids is found HERE as well! And if your kids love matching games like mine do, HERE is a great one you can print and make!
Oh and here is an awesome song that teaches about the apostles too! It's catchy, but in a good way! :)
I treat General Conference like a holiday around our house with special breakfasts, fun activities, and a countdown weeks before! We even do a crazy cleaning the previous week so my house is thoroughly clean and I can enjoy a weekend of pure spiritual upliftment--with NO big chores! My little ones love working on our Conference Board during the session that I found HERE and even my two-year-old stayed pretty focused when I made this (at least at the beginning of all four sessions! :) She LOVED moving the cards around and surprisingly learned A LOT!
Hope you all can watch and enjoy! Feel free to ask me any questions you may have about it, or share your thoughts!
A friend of mine started a Craft
Club in my neighborhood several years ago and I was invited to participate a
few years back.Now it has
transitioned from being a monthly club to more of an open group that meets once
a quarter (or season, rather).I
can take no credit for the idea but it is awesome!Although I’m not crafty by nature, this group has decorated
my house with so many of the projects I’ve been dying to have from Pinterest!I would never take the time to actually
do them on my own, but this way they get done in only a couple of hours in an
evening of socializing with my friends! Kills two birds with one stone!Love it!
Here’s how it works:
*The leader of the
group sends out email invites to whoever wants to participate and then has two people
per season volunteer to be in charge of that craft club.
Winter—December
or January
Spring—March
or April
Summer—May
or June
Fall—September
or October
*Whoever is in charge
of that season is in charge of finding a few craft options for everyone else to
vote on.Once the votes are in,
the people in charge purchase the materials for the craft (which everyone
reimburses when they come to craft night—usually under $15).Those in charge also do all the prep
work necessary for the craft to be completed by everyone in a few hours at
craft night.It’s a lot of
preparation for whoever is in charge, but the next time they come everything is
prepped for them!
*Craft club is usually
set for around 6:30 or 7:00 on a Tuesday night and everyone who has committed
to come, enjoys snacks provided by the hosts, works, socializes, and goes home
that night with a finished product (or sometimes more than one!)
I was in charge of our club this
month along with my friend Jessica, so we did a Fourth of July theme and did a
few different projects!I went
from having one Fourth of July wreath to now having my whole living room
decorated for the holiday!
We did
wooden American flags, canvas America sayings, and a wooden sign that said,
“Land of the Brave Because of the Free” in blue across America in red! I also made a banner the next day on my own. Everyone did their projects just a
little differently but they all turned out awesome!I love seeing how everyone puts their style and personality
into their work! See below for details on how we did our projects if you'd like to make one of your own! Large Wooden American Flag 1. Purchase a large piece of 1/4 in. MDF and cut to 34x24 (ish) (I bought 2x4 panels). 2. Paint the board white. Do two coats.
3. Measure 1 5/8 in. down from the top of the board and tape off white stripes using wide masking tape, using the tape as your width. If you tape three strips in a row then take off the middle and keep doing that all the way down, you don't have to measure! This way you also don't have to paint any white...just the red! Your top and bottom stripes will be slightly smaller than the rest, but it's not noticeable at all. 4. Paint stripes with red (Do a deep brick red). Do two coats then immediately take off paint strips after second coat. Let dry completely. 5. Tape off blue rectangle 16in. wide X 13 in. tall. 6. Put on contact paper stars in a circle around a bowl (for Betsy Ross style flag), then paint over with blue. Do two coats. Immediately after the second coat, remove the contact paper stars.
Tip: Put your finger in the middle of the star while using other fingers to remove it. This keeps the paint from smudging too badly. Don't stress too much though because you will be antiquing it!
For the traditional flag (pictured at the top of this post) I painted the square blue (two coats), let it dry, then made a template with my Silhouette out of contact paper in three pieces which I lined up on the blue--not an easy task--then painted them with three coats of white). Or you can just use a stamp if you have one. 7. After everything is completely dry, use a sander to go over it and antique as desired! When it is antiqued the way you like it, finish with a matte finishing spray and voila!!! You just made a $200+ flag for under $20!!!
Stars & Stripes Canvas 1. Purchase a 12X12 Canvas. 2. Paint blue. Do three coats. 3. After cutting saying on Silhouette and placing on transfer or contact paper, place words on completely dry sign. Use a credit card to smooth letters and make sure they stick. 4. Layer a coat of Mod Podge on top.
American "Land of the Free..." Sign 1. Use leftover wood from flag (1/4in. MDF) and cut to 24 1/2 X 5 3/4 in. 2. Paint wood white or off white. Do two coats. 3. Use a sander to antique as desired. 4. After cutting saying on Silhouette and placing on transfer or contact paper, place words on completely dry sign. Use a credit card to smooth letters and make sure they stick. 5. Layer a coat of Mod Podge on top.
Liberty Banner 1. Cut large stars on Silhouette out of background cardstock. 2. Cut smaller stars on Silhouette out of American themed scrapbook paper. 3. Glue stars together. 4. Cut vinyl letters on Silhouette and place on stars. 5. Punch holes and string together with desired string, ribbon, yarn, etc.
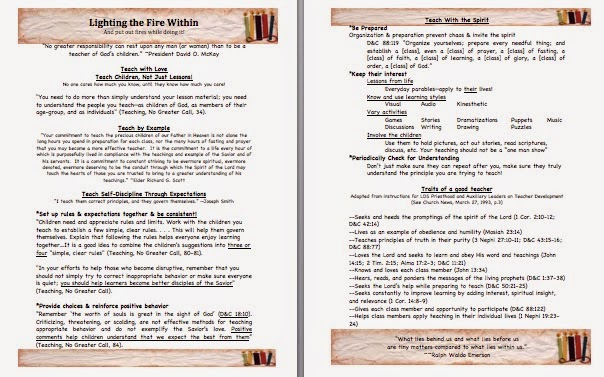 I was recently released from serving in the Primary Presidency in my ward at church. (For those of you who aren't Mormon, that means I helped lead and organize the teachers of the children who met in our church building.) Over the three years that I served, I was primarily in charge of leading the teacher training sessions we had once a year. I saved my lessons and handouts and felt maybe I should make them available for anyone who may find them useful in training teachers in other churches and wards as well! Hope it's helpful! I'll also be sharing more activities that we did, so look for those coming soon!