 Who
doesn't love the magic of the Christmas season? Twinkling lights,
delicious treats, beautiful decorations, carefully wrapped packages,
peaceful music, time with family and friends, and the wonder-filled eyes
of children. However, it saddens me that so many dread the season
these days because of the hectic craziness that shopping, parties, and
unfulfilled expectations have brought upon it. So many have forgotten,
as it's said, "The Reason for the Season!" It's not about presents,
Santa, or black Friday deals at the local shopping center. Christmas
began in a humble stable and should be remembered and celebrated with
the same quiet, humble, and peaceful love that it began.
Who
doesn't love the magic of the Christmas season? Twinkling lights,
delicious treats, beautiful decorations, carefully wrapped packages,
peaceful music, time with family and friends, and the wonder-filled eyes
of children. However, it saddens me that so many dread the season
these days because of the hectic craziness that shopping, parties, and
unfulfilled expectations have brought upon it. So many have forgotten,
as it's said, "The Reason for the Season!" It's not about presents,
Santa, or black Friday deals at the local shopping center. Christmas
began in a humble stable and should be remembered and celebrated with
the same quiet, humble, and peaceful love that it began.
I,
like most of you, am guilty of getting caught up in the busyness of the
holiday season, and forgetting its true purpose and meaning. That is
why I set a goal a few years ago to make something different of the
season, beginning with my decor, and continuing on to the way I count
down each moment leading up to the big day. This has not only impacted
my own perspective, but my hope is that it will shape the way my
children and their children celebrate the season that is Christmas! As
much as we love Santa, he's not the man in red I want them to focus on! :)
So,
with no further adieu, I share with you some of my favorite ways to
count down to CHRIST-mas! After all, the word "mas" means more in
Spanish, so shouldn't we have a little more Christ in our homes this time
of year?
I
hope that you find these ideas helpful as you strive to bring the
spirit of Christ back into the Christmas season in your homes and your
thoughts.
A Video A Day
I put together this video compilation of some of my favorite short Christmas videos a few years ago for my family and friends. I have now uploaded it to Youtube so that hopefully others can benefit! Please share it with anyone you know!!! Watch one a day with your family starting December 13th all the way to Christmas!
Day 1: Dec. 13th The Christmas Spirit 0:00
Day 2: Dec. 14th The Coat 4:01
Day 3: Dec. 15th An Angel Foretells Christ's Birth to Mary 6:16
Day 4: Dec. 16th Mary & Elisabeth Rejoice Together 10:26
Day 5: Dec. 17th Look To The Light 15:35
Day 6: Dec. 18th The Christ Child Is Presented At The Temple 20:12
Day 7: Dec. 19th Mary & Joseph Travel To Bethlehem 22:07
Day 8: Dec. 20th Shepherds Learn Of Christ's Birth 24:18
Day 9: Dec. 21st The Wise Men Seek Jesus 27:12
Day 10: Dec. 22nd Wise Men Still Seek Him 32:55
Day 11: Dec. 23rd The Old Shoemaker 36:33
Day 12: Dec. 24th A Gift To The World 40:05
Day 13: Dec. 25th Good Tidings Of Great Joy 49:21
He Is The Gift Website
Check out this website for awesome videos, stories, and information about the Savior for you and your family to learn, watch, and study together. It's AMAZING and answers so many questions you or your children may have about Jesus Christ and Christmas!
Countdown to Christ Calendar

I
can take no credit at all for this idea...I found it on Pinterest of
course! However, I couldn't find exact dimensions I needed so I had to work
through trial and error to make mine. Here is the link for the
beautiful calendar I found on Pinterest (I wish they could have just
sent me one because I honestly like theirs better than mine!), and here
are the dimensions and details of how I made mine, in case that's
helpful for any of you out there!
*Board 20" X 25" MDF Wood painted a brick red with a glossy spray on laquer coat on top.
*The word Christ is on a separate board of wood 3" X 15" hung 3.5 inches from the top of the large board painted a sage green.
*The white swirly stuff behind the Christ sign is some lacy-type scrapbook paper I had lying around that I mod podged on before nailing on the Christ sign, to add some dimension since mine was lacking!
*Nails are started 3/4in. down from the Christ sign and 3in. from the sides. They are spaced 3.5 inches apart from the middle of each nail to the next one and end 3 3/4 in. from the bottom of the board.
*Each square is 3in square and cut from a thin MDF then drilled holes in the tops. I also painted them white before I put on pictures and paper so if there was any border it would be a pretty one.
*The fronts are just scrapbook paper cut down to 3 in squares mod podged on with a vinyl number in the corner.
*The pictures on the backs I bought from Deseret Book. This is the most expensive part of the project as some were about 50 cents to a dollar each. I did 2-3 layers of mod podge to get these to stay after cutting them down to 3 in. squares.
*Just make sure to give plenty of dry time to all layers! You don't want to go to all of that work to have it stick together and ruin your beautiful pictures!
*Board 20" X 25" MDF Wood painted a brick red with a glossy spray on laquer coat on top.
*The word Christ is on a separate board of wood 3" X 15" hung 3.5 inches from the top of the large board painted a sage green.
*The white swirly stuff behind the Christ sign is some lacy-type scrapbook paper I had lying around that I mod podged on before nailing on the Christ sign, to add some dimension since mine was lacking!
*Nails are started 3/4in. down from the Christ sign and 3in. from the sides. They are spaced 3.5 inches apart from the middle of each nail to the next one and end 3 3/4 in. from the bottom of the board.
*Each square is 3in square and cut from a thin MDF then drilled holes in the tops. I also painted them white before I put on pictures and paper so if there was any border it would be a pretty one.
*The fronts are just scrapbook paper cut down to 3 in squares mod podged on with a vinyl number in the corner.
*The pictures on the backs I bought from Deseret Book. This is the most expensive part of the project as some were about 50 cents to a dollar each. I did 2-3 layers of mod podge to get these to stay after cutting them down to 3 in. squares.
*Just make sure to give plenty of dry time to all layers! You don't want to go to all of that work to have it stick together and ruin your beautiful pictures!

 The baby socks
have a story or scripture for each day (along with a small treat of
course! :)) and are just numbered with vinyl numbers. I looked for cheap socks for FOREVER and finally found them here. They are out of stock now, but who knows if they will come back. Some of the socks also have a small nativity character in
them for special days when we do a character study of a different person
in the nativity. After we study each character, we add them to a small
nativity that will be completed by Christmas. This is an idea I got
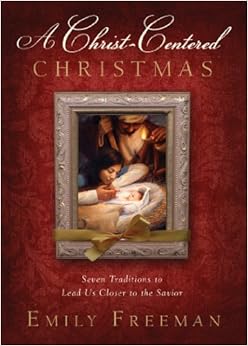
from an AMAZING book called A Christ Centered Christmas. I highly
recommend it! It's a quick read with awesome stories and activities to
do with your family to help them to draw closer to Christ.
The baby socks
have a story or scripture for each day (along with a small treat of
course! :)) and are just numbered with vinyl numbers. I looked for cheap socks for FOREVER and finally found them here. They are out of stock now, but who knows if they will come back. Some of the socks also have a small nativity character in
them for special days when we do a character study of a different person
in the nativity. After we study each character, we add them to a small
nativity that will be completed by Christmas. This is an idea I got
from an AMAZING book called A Christ Centered Christmas. I highly
recommend it! It's a quick read with awesome stories and activities to
do with your family to help them to draw closer to Christ.
Names of Christ Star Ornaments

This
was also an idea inspired by A Christ Centered Christmas, but the ones
you can purchase were silver and I wanted mine to stand out on my tree a
bit more. Mine are very simple, but I love how they make me think of
the Savior just a little bit more whenever I look at my tree! Remember,
He was born in a very simple, humble place! My humble stars remind me
just a little bit more of that place, and that perfect child!
I
bought the wooden stars (20 of them) for about 30 cents each, had my
husband drill holes in them and then painted them yellow with a silver
sparkle glaze (I made the mistake of doing the glaze after the letters
though and messed up a bunch of them because it smeared the paint!
Sadness!!! So, IF you glaze, do it before you write!).
To
put the words on them I just printed the names of Christ on a sheet of
paper in a font I liked and traced it onto the wood (the wood was soft
enough that tracing indented the words on the wood). After the wood was
indented with the name, I just used a permanent black marker to trace
it. Thread them with ribbons and you're done!

Kid-friendly Nativities
Some
of my favorite memories of Christmas time are of an old Nativity that
my mom gave to me to play with. I would spend hours playing with the
figures and recreating the Christmas story. Far too often a Nativity is
a touch-me-not decoration in our homes. And yes, I have one of those
too. However, I think it's so important to teach our children that the
Savior is not this distant being that we cannot get near. He is our loving brother and friend! He is accessible and as close
to us as we allow and want Him to be. What better way to teach that to
them than giving them access at a young age to those figures that tell
the story of His birth. A small thing that can really create a fond
memory and feeling.
Yet
again, I got this idea from Pinterest at this site, with a little variation according to what I could find at the craft store and then just used scraps of material
to make the clothes for the little wooden nativity. I am NOT very
creative and crafty on my own to be honest. I mean, the glue gun and I
have a love/hate relationship, leaning more towards the latter! My
sister-in-law did the sheep for me which were pretty awesome I thought!
I would have just glued on a bunch of cotton balls and called it good!
I can't tell you how to recreate the wise men hats (sorry!)...they just
kind of happened as I attempted to take needle and thread to a small
scrap of fabric (this was huge for me since I don't even own a sewing machine!). I could never do it again, but I'm glad they turned
out okay! My husband used his engineering skills and made the stable
and manger out of popsicle sticks and a glue gun after my daughter
insisted Jesus have a stable. He has a similar relationship (and scar) with the
glue gun after that experience but it turned out pretty awesome I think! Oh the sacrifices we make for our children! :)


Fisher Price also has the cutest Nativity that we just bought last year on sale and my
kids love it just as much! I probably would have never made the first
one to be honest, had I been able to find it at a reasonable price when I
was looking, but now you can even find them in Wal-Mart and Target for
around $30!!! So worth it!
Merry CHRIST-mas to you all!
© 2014 Leaflet Radiance All Rights Reserved
© 2014 Leaflet Radiance All Rights Reserved


